- Voxel Meshing for the Rest of us
- How (Not) to Improve Voxel Meshing Performance
- Adding Ambient Occlusion To Our Voxel Mesher
Like many of you creating a voxel game, I have also read that one article.
It’s a fine article, but far too academic for my taste. I left feeling like I had just attended a lecture, not really grasping any of the content.
So here’s my attempt at presenting the same topic in a more conversational tone. With a little help from our friend Ferris.
Hello!
Defining the Problem
So you want to mesh voxels.
But what exactly are voxels? How big will each mesh be? What will the output look like?
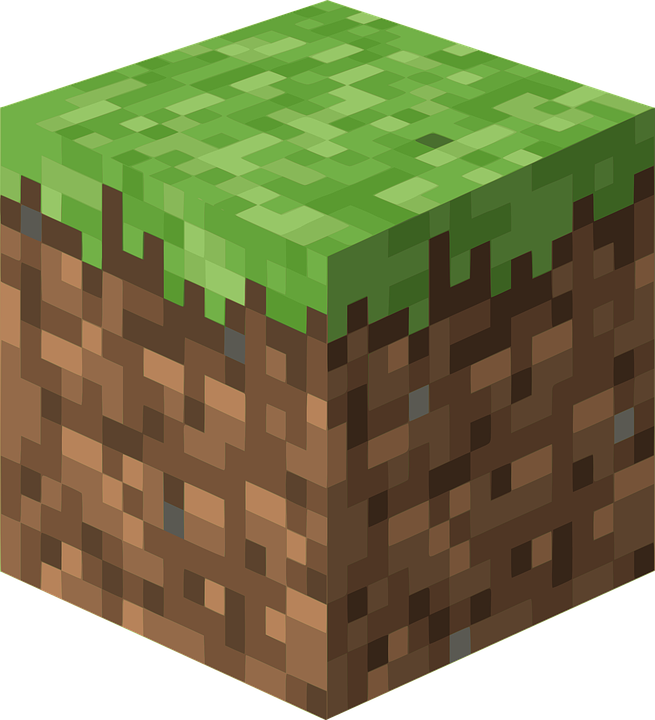
Well, voxels are just blocks, and obviously we’re going to use Chunks. Like Minecraft!
I was getting there.
Voxels
A voxel is the smallest individual unit that can be modified or displayed in a voxel game1The more academic definition is the three dimensional equivalent to a pixel but as games like Minecraft have popularized larger voxels this doesn’t make as much sense..
Minecraft has the Block – Robocraft has the cube, Teardown has the … Voxel …
We get it.
So given all of these different games have different names for what is essentially the same thing, what exactly is a voxel? I mean, what data does a voxel need to represent?
Well, we know that there can be different types of voxels. So we should be able to compare them.
pub trait Voxel: Eq {

}
Alright, great! That’s all we ne-
But what about glass? Or air? Shouldn’t these be special cases?
Oh, right.
Whether or not a voxel is the same as another one isn’t actually enough, we also need to know whether or not we can see through it2Transparent / Opaque or if we should even generate geometry3Empty.
#[derive(Debug, Clone, Copy, PartialEq, Eq)]
pub enum Visibility {
  Empty,
  Transparent,
  Opaque,
}

pub trait Voxel: Eq {
  fn visibility(&self) -> Visibility;
}
Exactly why will become obvious soon.
… and what about liquids? Water and lava? Like in Minecraft!
You actually don’t need special behavior in the meshing algorithm for this – as it’s a purely visual effect all you need to do is offset these vertices in the shader.
Okay … But how will we handle tall grass, vines, or even running water and stairs?
Those aren’t voxels, we don’t care.
But –
We don’t care!
You’ll need those in a finished game.
… Fair enough.
We actually won’t special case them here because they all have unique geometry and are extremely opinionated. Every game has their own idea of what stairs even are, or how water should flow.
You could treat them as empty for the purposes of the terrain mesh, and then after it’s finished loop through the voxels again handling the special cases.
Vines, ladders, rails, and paintings can all be implemented as a single quad with a simple texture.
Tall grass, sugarcane, and wheat can all be implemented as two quads in a cross pattern.
Flowing liquids are a lot harder – some level of occlusion must be used here or there would be mysterious planes of liquid inside the flow. I’ll leave implementation up to the reader (or a future post).
Darn.
Chunks

All4Well, maybe not all voxel games, but I’d be willing to bet all of the popular ones do. voxel games have their own version of a chunk – a group of voxels that are treated as a single unit for purposes of meshing, collision, updating, etc.
Standard chunk sizes are 16 x 16 x 16 or 32 x 32 x 32. Any more and you’ll end up having latency issues during meshing. Any less and you’ll have way too many individual chunks.
Additionally, chunks should be cubic.
But what about Minecraft? I thought a Chunk was 16 x 384 x 16! That’s definitely not cubic.
Actually, Minecraft does actually use chunk sizes of 16 x 16 x 16, they just call them Sections or sub-chunks instead. Keeping your chunk cubic will eliminate a lot of pain points, but I digress – we actually won’t assume this for the purposes of this article.
Huh, I never knew that.
Yep.
Now let’s move on to implementation.
A Chunk is composed of Voxels and has a fixed three dimensional size. It should allow us to retrieve voxels by position and provide helpers for iteration.
pub trait Chunk {
  type Output;

  const X: usize;
  const Y: usize;
  const Z: usize;

  fn size() -> usize {
    Self::X * Self::Y * Self::Z
  }

  fn linearize(x: usize, y: usize, z: usize) -> usize {
    x + (y * Self::X) + (z * Self::X * Self::Y)
  }

  fn delinearize(mut index: usize) -> (usize, usize, usize) {
    let z = index / (Self::X * Self::Y);
    index -= z * (Self::X * Self::Y);

    let y = index / Self::X;
    index -= y * Self::X;

    let x = index;

    (x, y, z)
  }

  fn get(&self, x: usize, y: usize, z: usize) -> Self::Output;
}
In this trait, delinearize allows us to turn a linear index into a 3d coordinate, while linearize does the inverse.
We don’t actually require your data to be linear5Laid out as a single, continuous block in memory., but we assume it is. We’ll have to iterate linearly, so this makes sense.
Output
Now that we’ve figured out what our input looks like, what do we want our mesher to output?
Really? We want a mesh!
Not exactly.
Each voxel game has different requirements and some may even want to split up meshes dynamically based on voxel type or visibility.
We can’t possibly handle this within the mesher itself.
Oh… So what will we output?
QuadGroups.
#[derive(Copy, Clone, Debug)]
pub struct Quad {
  pub voxel: [usize; 3],
  pub width: u32,
  pub height: u32,
}

#[derive(Default)]
pub struct QuadGroups {
  pub groups: [Vec<Quad>; 6],
}
A Quad is a quadrilateral composed of two triangles. It has a width, height, and the indices of the voxel it represents within the Chunk.
QuadGroups represents the output of the mesher, one Vec of Quads for each possible voxel face orientation.
Neat.
With this, we can take a shot at defining a meshing function.
pub fn generate_mesh<C, T>(chunk: &C) -> QuadGroups
where
  C: Chunk<Output = T>,
  T: Voxel,
{
  todo!()
}
It compiles!
And how long will this implementation last?
… It compiles …
Simple Meshing
Now that we’ve got the fundamentals nailed down, we can start to implement the mesher itself.
We’ll iterate through all of the voxels in the mesh. If the voxel is empty, we won’t produce any geometry. Otherwise, for each face of the voxel we’ll compare it with the corresponding neighbor. If both are opaque, we won’t generate geometry. If the neighbor is transparent, we’ll compare the voxels and generate a face if they are different.
pub fn simple_mesh<C, T>(chunk: &C) -> QuadGroups
where
  C: Chunk<Output = T>,
  T: Voxel,
{
  let mut buffer = QuadGroups::default();

  for i in 0..C::size() {
    let (x, y, z) = C::delinearize(i);

    let voxel = chunk.get(x, y, z);

    match voxel.visibility() {
      Visibility::Empty => continue,
      visibility => {
        let neighbors = [
          chunk.get(x-1, y, z),
          chunk.get(x+1, y, z),
          chunk.get(x, y-1, z),
          chunk.get(x, y+1, z),
          chunk.get(x, y, z-1),
          chunk.get(x, y, z+1),
        ];

        todo!();
      }
    }
  }

  buffer
}
… Let’s make sure it works before we go any further.
We’ll define a chunk with size 16 x 16 x 16 and populate it with all different kinds of voxels.
#[derive(Copy, Clone, Default, PartialEq, Eq)]
pub enum MyVoxel {
  #[default]
  Empty,
  Opaque(u16),
  Transparent(u16),
}

impl Voxel for MyVoxel {
  fn visibility(&self) -> Visibility {
    match self {
      Self::Empty => Visibility::Empty,
      Self::Opaque(_) => Visibility::Opaque,
      Self::Transparent(_) => Visibility::Transparent,
    }
  }
}

pub struct MyChunk {
  voxels: Box<[MyVoxel; 16*16*16]>,
}

impl Default for MyChunk {
  fn default() -> Self {
    Self { voxels: Box::new([MyVoxel::default(); 16*16*16]) }
  }
}

impl Chunk for MyChunk {
  type Output = MyVoxel;

  const X: usize = 16;
  const Y: usize = 16;
  const Z: usize = 16;

  fn get(&self, x: usize, y: usize, z: usize) -> Self::Output {
    self.voxels[Self::linearize(x, y, z)]
  }
}

fn main() {
  let mut chunk = MyChunk::default();

  for i in 0..MyChunk::size() {
    let (x, y, z) = MyChunk::delinearize(i);

    let voxel = if ((x * x + y * y + z * z) as f32).sqrt() < 8.0 {
      if y > 4 {
        MyVoxel::Opaque(1)
      } else if x > 4 {
        MyVoxel::Transparent(1)
      } else {
        MyVoxel::Opaque(2)
      }
    } else {
      MyVoxel::Empty
    };

    chunk.voxels[i] = voxel;
  }

  let result = simple_mesh(&chunk);
}
And …
thread 'main' panicked at 'index out of bounds: the len is 4096 but the index is 18446744073709551615'That’s a big number.
No kidding.
We’ve run into our first issue. Say we are retrieving neighbors for the voxel at (0,0,0) – it will attempt to look up (1,0,0), (-1,0,0), (0,1,0), (0,-1,0), (0,0,1), and (0,0,-1). The negative value wraps around and causes the index out of bounds panic.
We could resolve this by returning Empty if the access would be out of bounds, but there is another problem hidden here.
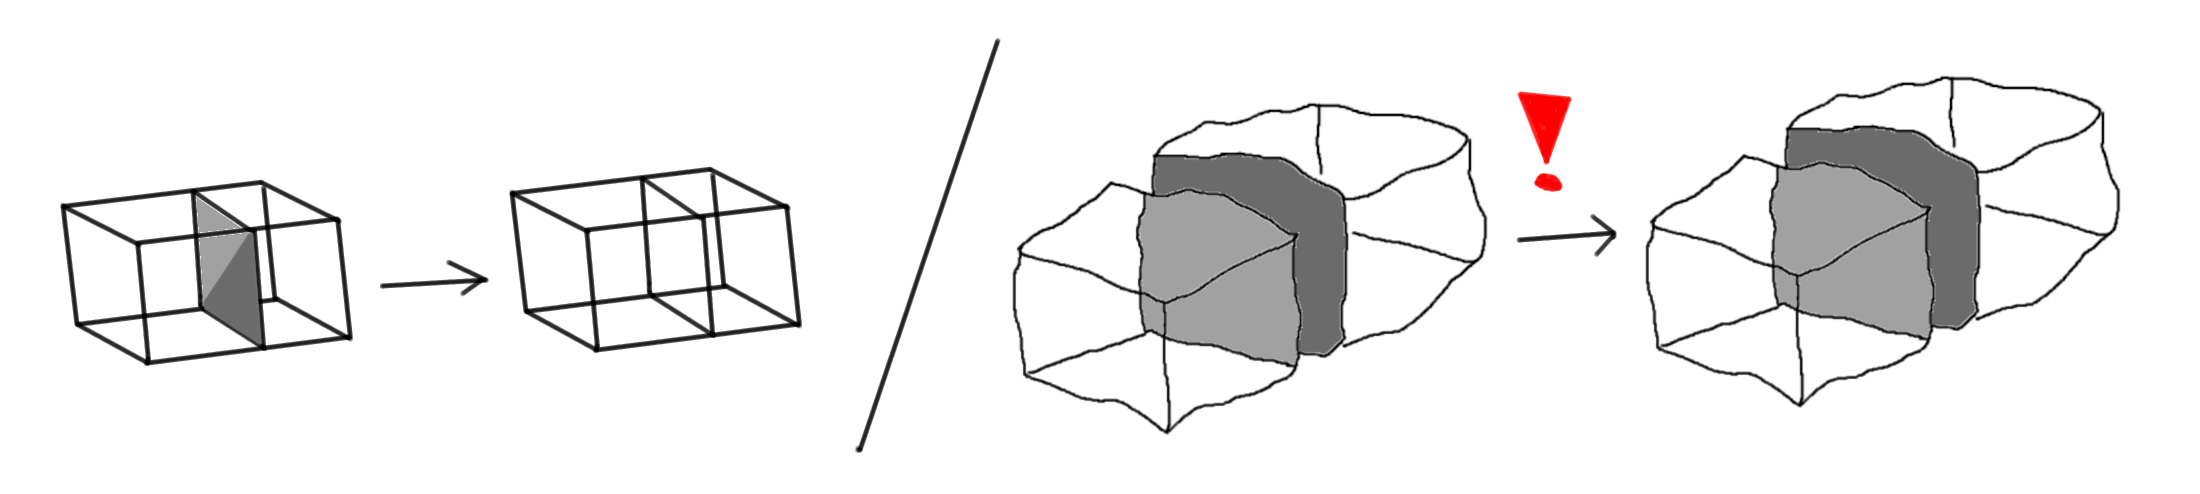
Inside a chunk when two neighboring voxels are opaque a face will not be generated between them. However, as our mesher only ever acts on a single chunk (and has no concept of neighboring chunks), faces would always be generated between chunks!
This doesn’t seem like that big of a deal at first but consider that even chunks which are entirely surrounded by other chunks would be rendered. It’s a huge problem.
So how can we fix this?
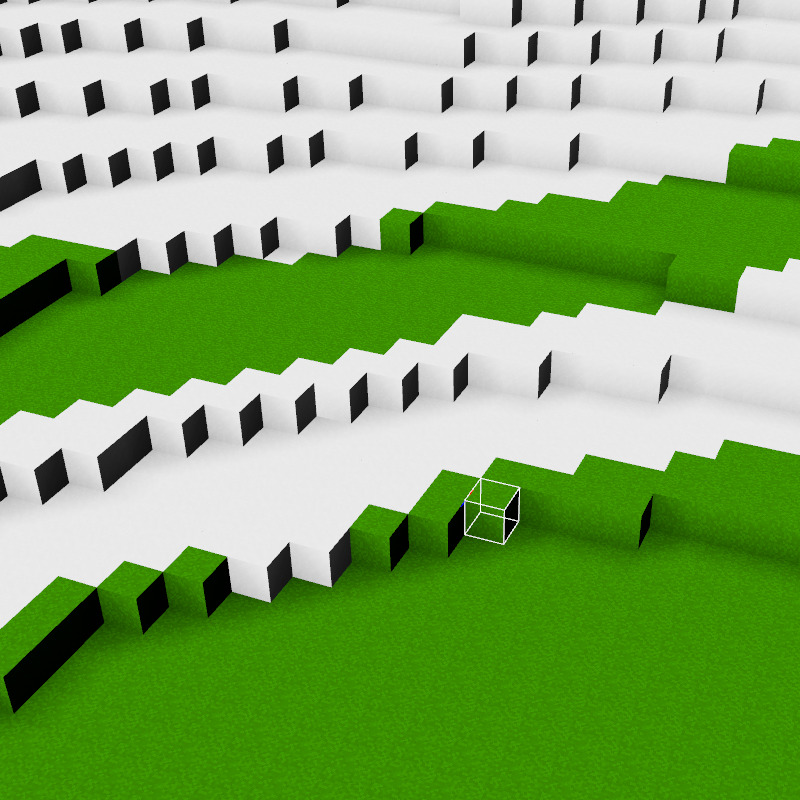
Instead of accepting a Chunk of 16 x 16 x 16 we will accept a Chunk Boundary of 18 x 18 x 18 – where each of the six sides includes a single voxel wide slice of the neighboring chunk.
These voxels will not be meshed directly, they will only be used to determine whether or not we should be meshing the voxel inside of the actual chunk.
So it’s just the six direct neighbors? What about the twenty other neighbors?
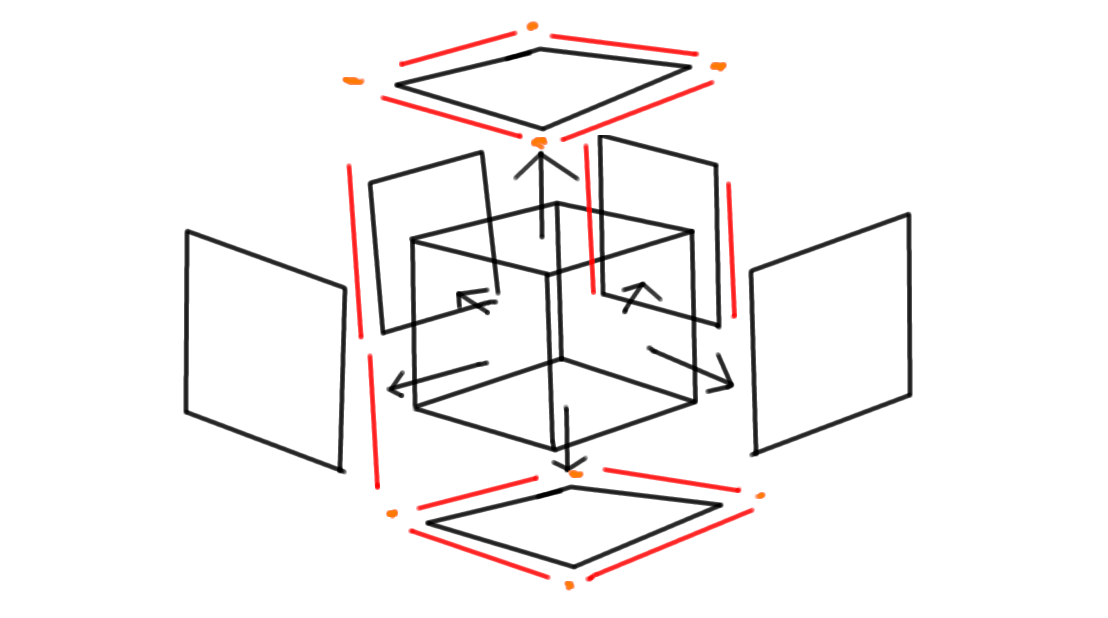
Luckily enough, only the center and the six direct neighbors actually have an effect on our chunk’s mesh6Once we implement Ambient Occlusion, we will need to consider all 26 neighbors.. We can just fill the rest with empty voxels.
Well, at least we have that. What will the mesher look like with these changes?
Instead of iterating over every voxel in the mesh, we will only iterate over the voxels in the center of the chunk boundary. We will also make sure that the chunk boundary is in fact large enough to be a chunk.
pub fn simple_mesh<C, T>(chunk: &C) -> QuadGroups
where
  C: Chunk<Output = T>,
  T: Voxel,
{
  assert!(C::X >= 2);
  assert!(C::Y >= 2);
  assert!(C::Z >= 2);

  let mut buffer = QuadGroups::default();

  for i in 0..C::size() {
    let (x, y, z) = C::delinearize(i);

    if (x > 0 && x < C::X - 1) &&
       (y > 0 && y < C::Y - 1) &&
       (z > 0 && z < C::Z - 1) {

      let voxel = chunk.get(x, y, z);
A little gross, but it should work. Fingers crossed.
thread 'main' panicked at 'not yet implemented'Yay!
Always nice to see a good panic. Now let’s actually build the algorithm.
We’ll start by defining some shorthand consts for Visibility.
pub const EMPTY: Visibility = Visibility::Empty;
pub const OPAQUE: Visibility = Visibility::Opaque;
pub const TRANSPARENT: Visibility = Visibility::Transparent;
Now it’s time for the implementation.
pub fn simple_mesh<C, T>(chunk: &C) -> QuadGroups
where
  C: Chunk<Output = T>,
  T: Voxel,
{
  assert!(C::X >= 2);
  assert!(C::Y >= 2);
  assert!(C::Z >= 2);

  let mut buffer = QuadGroups::default();

  for i in 0..C::size() {
    let (x, y, z) = C::delinearize(i);

    if (x > 0 && x < C::X - 1) &&
       (y > 0 && y < C::Y - 1) &&
       (z > 0 && z < C::Z - 1) {

      let voxel = chunk.get(x, y, z);

      match voxel.visibility() {
        EMPTY => continue,
        visibility => {
          let neighbors = [
            chunk.get(x - 1, y, z),
            chunk.get(x + 1, y, z),
            chunk.get(x, y - 1, z),
            chunk.get(x, y + 1, z),
            chunk.get(x, y, z - 1),
            chunk.get(x, y, z + 1),
          ];

          for (i, neighbor) in neighbors.into_iter().enumerate() {
            let other = neighbor.visibility();

            let generate = match (visibility, other) {
              (OPAQUE, EMPTY) |
              (OPAQUE, TRANSPARENT) |
              (TRANSPARENT, EMPTY) => true,

              (TRANSPARENT, TRANSPARENT) => {
                voxel != neighbor,
              }

              (_, _) => false,
            };

            if generate {
              buffer.groups[i].push(Quad {
                voxel: [x, y, z],
                width: 1,
                height: 1,
              });
            }
          }
        }
      }
    }
  }

  buffer
}
Great!
Our meshing algorithm is complete.
Wow, that was easy!
Yep, but we’re not quite done yet.
Remember that the output is just QuadGroups.
A Mesh is constructed from vertices7Points in 3d space and triangles that connect those vertices together. Each vertex has a number of associated values8Vertex Attributes like position, normal, and UV9What position the vertex would map to on a 2D texture.
Before we can use it, we’ll need to convert our QuadGroups into a Mesh.
How?
First, let’s see what a Vertex looks like. We won’t end up using this, but it’s good to get an idea of what it looks like:
pub struct Vertex {
  pub position: [f32; 3],
  pub normal: [f32; 3],
  pub uv: [f32; 2],
}
For each Quad in our buffer, we’ll need to generate four Vertices. We will then combine these together to build the Mesh.
However, our Quads are unoriented and unsized. We don’t know what direction they are facing and the width and height fields are measured in voxel units. We’ll need to convert them before we can extract the Vertices.
To provide orientation for Quads, let’s define Side.
pub enum Axis {
  X,
  Y,
  Z,
}

pub struct Side {
  pub axis: Axis,
  pub positive: bool,
}

impl Side {
  pub fn new(axis: Axis, positive: bool) -> Self {
    Self { axis, positive }
  }

  pub fn normal(&self) -> [f32; 3] {
    match (&self.axis, &self.positive) {
      (Axis::X, true)  => [1.0,  0.0,  0.0], // X+
      (Axis::X, false) => [-1.0, 0.0,  0.0], // X-
      (Axis::Y, true)  => [0.0,  1.0,  0.0], // Y+
      (Axis::Y, false) => [0.0, -1.0,  0.0], // Y-
      (Axis::Z, true)  => [0.0,  0.0,  1.0], // Z+
      (Axis::Z, false) => [0.0,  0.0, -1.0], // Z-
    }
  }

  pub fn normals(&self) -> [[f32; 3]; 4] {
    [self.normal(), self.normal(), self.normal(), self.normal()]
  }
}
The Side defines what side of the voxel the Quad represents.
Now that we have Side, we can introduce Face, the sized, oriented version of a Quad.
pub struct Face<'a> {
  side: Side,
  quad: &'a Quad,
}

impl<'a> Face<'a> {
  pub fn indices(&self, start: u32) -> [u32; 6] {
     [start, start + 2, start + 1, start + 1, start + 2, start + 3]
  }

  pub fn positions(&self, voxel_size: f32) -> [[f32; 3]; 4] {
    todo!()
  }

  pub fn normals(&self) -> [[f32; 3]; 4] {
    self.side.normals()
  }

  pub fn uvs(&self, flip_u: bool, flip_v: bool) -> [[f32; 2]; 4] {
    match (flip_u, flip_v) {
      (true, true)   => [[1.0, 1.0], [0.0, 1.0], [1.0, 0.0], [0.0, 0.0]],
      (true, false)  => [[1.0, 0.0], [0.0, 0.0], [1.0, 1.0], [0.0, 1.0]],
      (false, true)  => [[0.0, 1.0], [1.0, 1.0], [0.0, 0.0], [1.0, 0.0]],
      (false, false) => [[0.0, 0.0], [1.0, 0.0], [0.0, 1.0], [1.0, 1.0]],
    }
  }

  pub fn voxel(&self) -> [usize; 3] {
    self.quad.voxel
  }
}
We’ll pull in normals from the Side, and the voxel from the Quad.
We calculate indices, positions and UVs ourselves.
Why do we define the UVs like that?
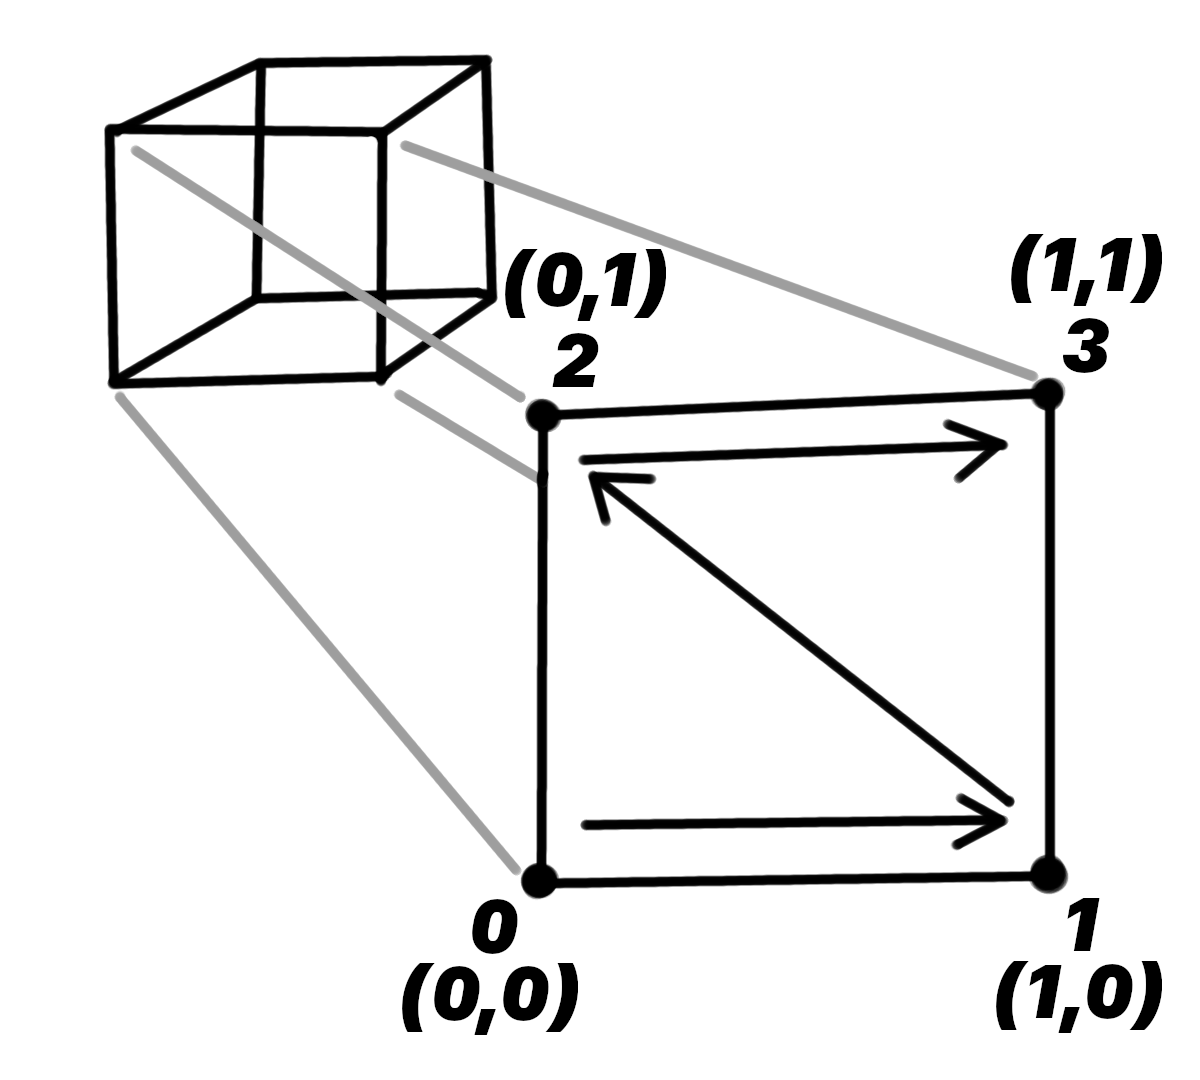
(0, 0) and the top right is (1, 1).The exact choice of UV coordinates depends on your engine. That’s why we supply flip_u and flip_v. However, this particular order is a common choice.
… and what about the indices?
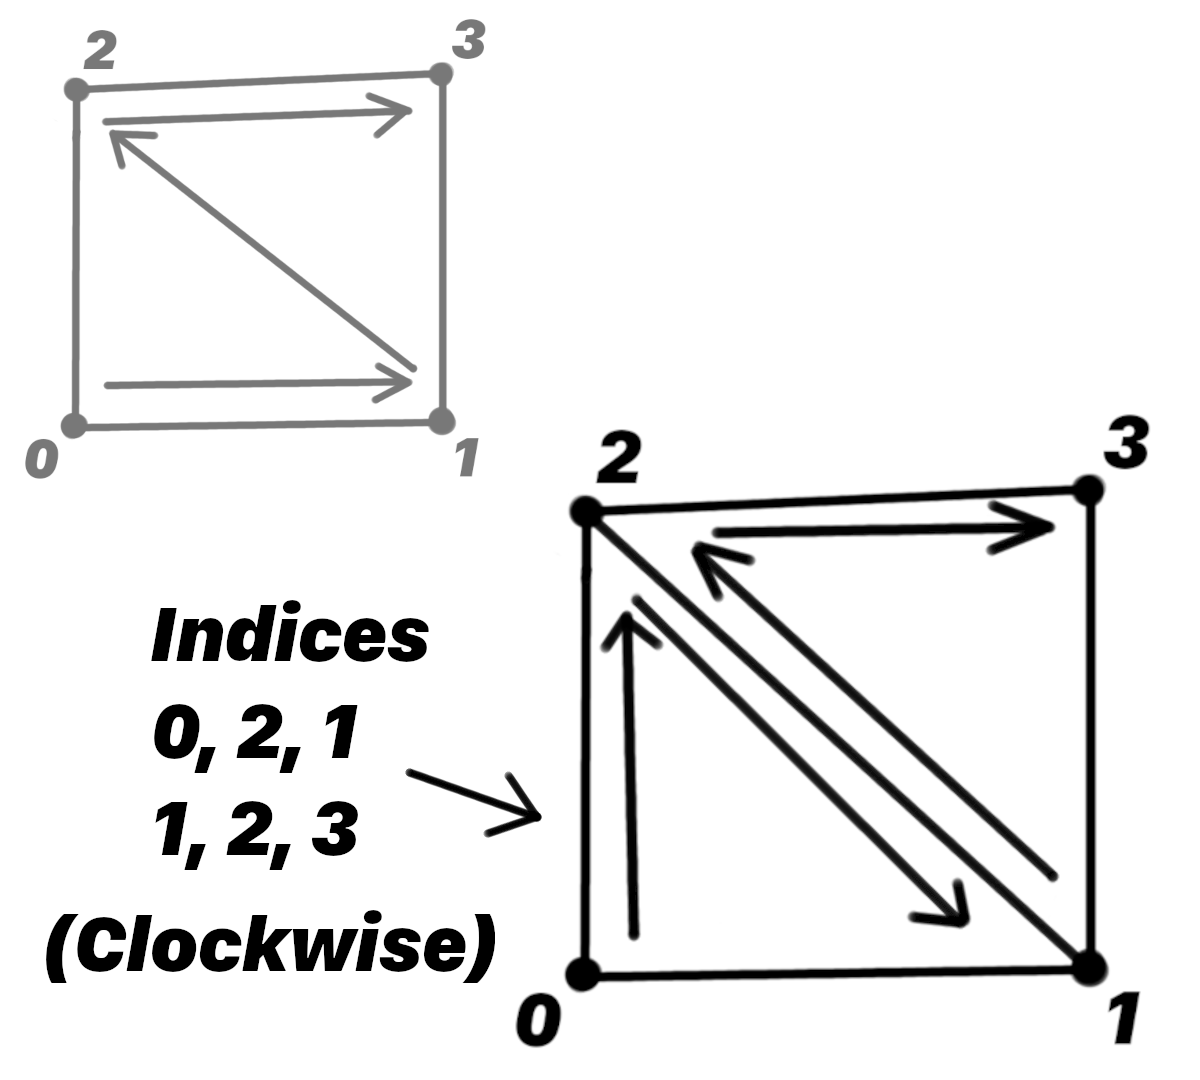
Triangles in 3d rendering are one-sided10(usually). Given three vertices, a triangle has two possible configurations – facing inwards or outwards. The direction it is facing is defined by its winding order – whether its sides are defined clockwise or counterclockwise.
We choose clockwise, as the triangles are facing outwards. Note that as long as the winding order is the same, the actual order of the indices doesn’t matter.
We could have chosen (0, 2, 1), (2, 1, 0), or (1, 0, 2) for the triangle on the left and got the same results.
We accept the offset parameter because each group of indices needs to be offset by the number of indices already defined.
Cool. What’s next?
Before we get into the weeds with the positions method, we should go back to QuadGroups and create an Iterator for it that returns Face:
// For our new `iter()` method
// Note: it is important this matches the neighbor ordering from `simple_mesh`
impl From<usize> for Side {
  fn from(value: usize) -> Self {
    match value {
      0 => Self::new(Axis::X, false), // X-
      1 => Self::new(Axis::X, true),  // X+
      2 => Self::new(Axis::Y, false), // Y-
      3 => Self::new(Axis::Y, true),  // Y+
      4 => Self::new(Axis::Z, false), // Z-
      5 => Self::new(Axis::Z, true),  // Z+
      _ => unreachable!()
    }
  }
}

impl QuadGroups {
  pub fn iter(&self) -> impl Iterator<Item = Face> {
    self.groups
      .iter()
      .enumerate()
      .flat_map(|(index, quads)| quads.iter().map(move |quad| (index, quad)))
      .map(|(index, quad)| Face {
        side: index.into(),
        quad,
      })
    }
}
The Iterator itself’s a bit dense, but it will make sense after we break it down.
First, for each group in QuadGroups, assign it an index.
self.groups
  .iter()
  // &Vec<Quad>
  .enumerate()
  // (usize, &Vec<Quad>)
Next, map each group into an Iterator of group-indexed Quads and flatten it.
// (usize, &Vec<Quad>)
.flat_map(|(index, quads)| {
  // &Vec<Quad>
  quads
    .iter()
    // &Quad
    .map(move |quad| (index, quad))
    // (usize, &Quad)

  // Iterator<Item = (usize, &Quad)>
})
// (usize, &Quad)
Finally, map each group-indexed Quad into a Face, converting the group index to Side.
// (usize, &Quad)
.map(|(index, quad)| Face {
  side: index.into(), // usize -> Side
  quad,
})
// Face
Iterators are awesome!
Ergonomic and fast.
Now that we’ve finished our Iterator, we can update our test Mesh creation code:
// fn main()

let result = simple_mesh(&chunk);

let mut positions = Vec::new();
let mut indices = Vec::new();
let mut normals = Vec::new();
let mut uvs = Vec::new();

for face in result.iter() {
  positions.extend_from_slice(&face.positions(1.0)); // Voxel size is 1m
  indices.extend_from_slice(&face.indices(positions.len() as u32));
  normals.extend_from_slice(&face.normals());
  uvs.extend_from_slice(&face.uvs(false, true));
}

let mut mesh = Mesh::new(PrimitiveTopology::TriangleList);

mesh.set_indices(Some(Indices::U32(indices)));

mesh.insert_attribute(Mesh::ATTRIBUTE_POSITION, positions);
mesh.insert_attribute(Mesh::ATTRIBUTE_NORMAL, normals);
mesh.insert_attribute(Mesh::ATTRIBUTE_UV_0, uvs);
We’ll give it a shot.
thread 'main' panicked at 'not yet implemented'Not as happy to see this now …
Nope, it’s time to implement positions.
// pub fn positions(&self, voxel_size: f32) -> [[f32; 3]; 4]

let positions = match (&self.side.axis, &self.side.positive) {
  (Axis::X, false) => [[?, ?, ?], [?, ?, ?], [?, ?, ?], [?, ?, ?]],
  (Axis::X, true)  => [[?, ?, ?], [?, ?, ?], [?, ?, ?], [?, ?, ?]],
  (Axis::Y, false) => [[?, ?, ?], [?, ?, ?], [?, ?, ?], [?, ?, ?]],
  (Axis::Y, true)  => [[?, ?, ?], [?, ?, ?], [?, ?, ?], [?, ?, ?]],
  (Axis::Z, false) => [[?, ?, ?], [?, ?, ?], [?, ?, ?], [?, ?, ?]],
  (Axis::Z, true)  => [[?, ?, ?], [?, ?, ?], [?, ?, ?], [?, ?, ?]],
};

let (x, y, z) = (
  (self.quad.voxel[0] - 1) as f32,
  (self.quad.voxel[1] - 1) as f32,
  (self.quad.voxel[2] - 1) as f32,
);

[
  [
    x * voxel_size + positions[0][0] * voxel_size,
    y * voxel_size + positions[0][1] * voxel_size,
    z * voxel_size + positions[0][2] * voxel_size,
  ],
  [
    x * voxel_size + positions[1][0] * voxel_size,
    y * voxel_size + positions[1][1] * voxel_size,
    z * voxel_size + positions[1][2] * voxel_size,
  ],
  [
    x * voxel_size + positions[2][0] * voxel_size,
    y * voxel_size + positions[2][1] * voxel_size,
    z * voxel_size + positions[2][2] * voxel_size,
  ],
  [
    x * voxel_size + positions[3][0] * voxel_size,
    y * voxel_size + positions[3][1] * voxel_size,
    z * voxel_size + positions[3][2] * voxel_size,
  ],
]
You’re missing something.
I know – but just think about it. What exactly would go here?
We don’t even know what direction is up.
The choice of coordinate system will determine what direction is up, and what order the other axes are in.
Weird. What’s next?
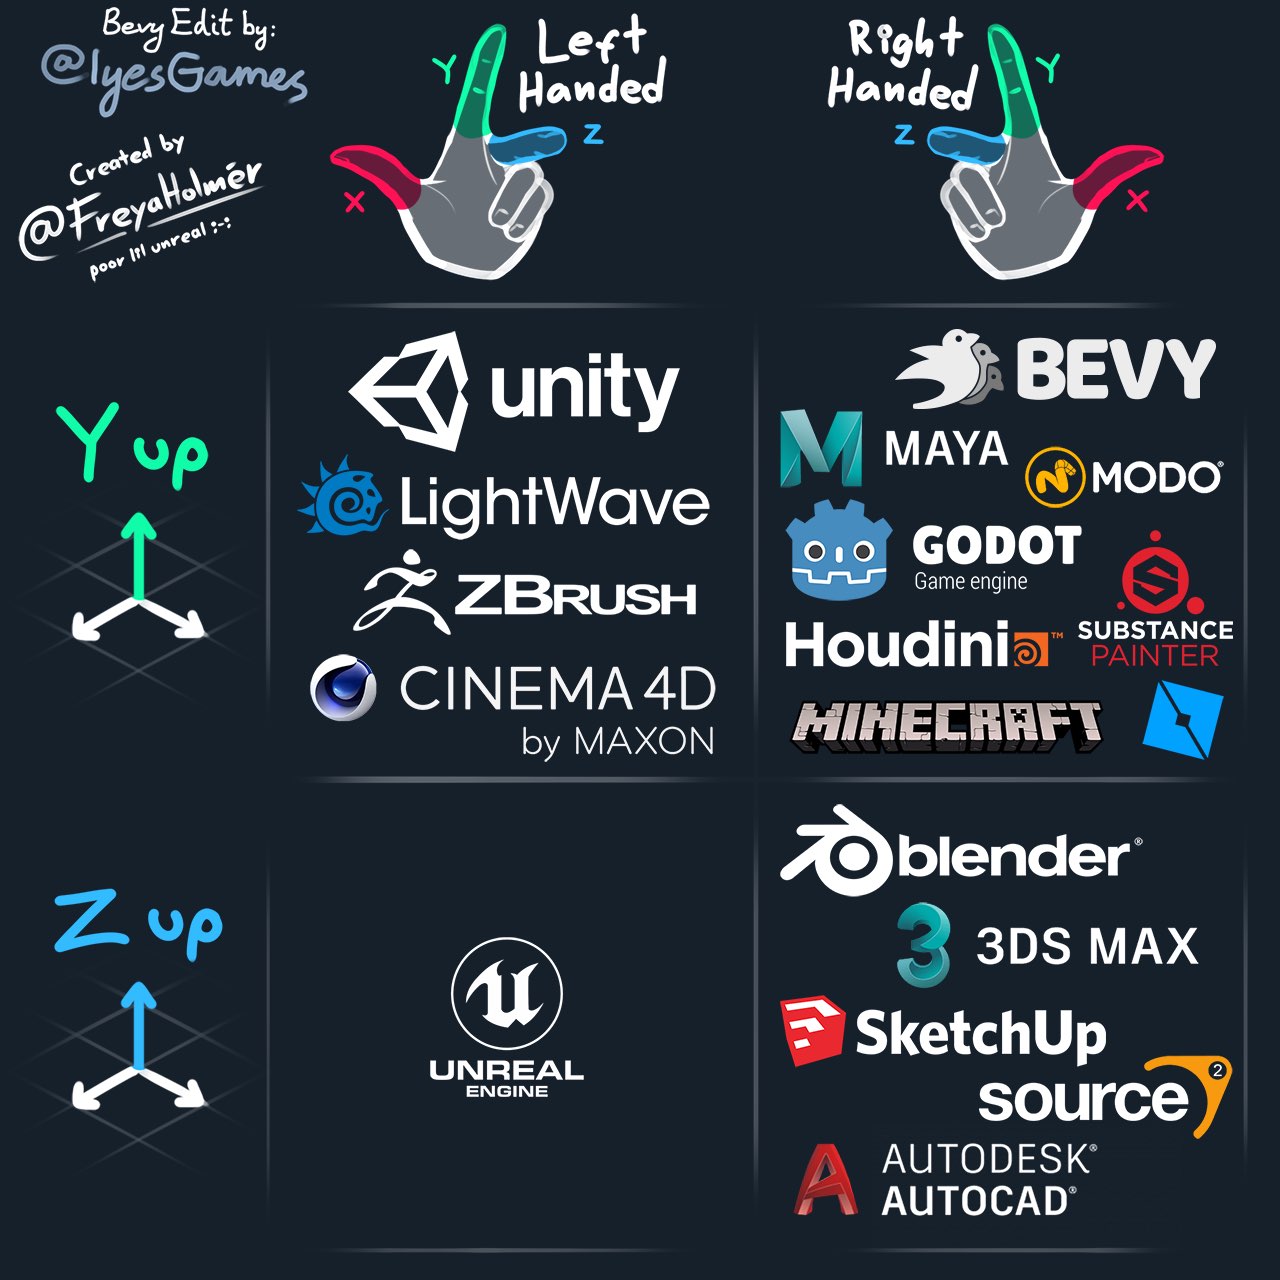
Since we are using Bevy to build our game our coordinate system is Right-Handed Y-Up. We’ll assume this is the case for you too.
What if it’s not?
I think it’s best to leave implementing orientation-agnostic positions as an exercise for the reader.
Darn!

With this and the ordering we determined with the UVs earlier, we can fill in the blanks:
let positions = match (&self.side.axis, &self.side.positive) {
  (Axis::X, false) => [[0.0, 0.0, 1.0], [0.0, 0.0, 0.0], [0.0, 1.0, 1.0], [0.0, 1.0, 0.0]],
  (Axis::X, true)  => [[1.0, 0.0, 0.0], [1.0, 0.0, 1.0], [1.0, 1.0, 0.0], [1.0, 1.0, 1.0]],
  (Axis::Y, false) => [[0.0, 0.0, 1.0], [1.0, 0.0, 1.0], [0.0, 0.0, 0.0], [1.0, 0.0, 0.0]],
  (Axis::Y, true)  => [[0.0, 1.0, 1.0], [0.0, 1.0, 0.0], [1.0, 1.0, 1.0], [1.0, 1.0, 0.0]],
  (Axis::Z, false) => [[0.0, 0.0, 0.0], [1.0, 0.0, 0.0], [0.0, 1.0, 0.0], [1.0, 1.0, 0.0]],
  (Axis::Z, true)  => [[1.0, 0.0, 1.0], [0.0, 0.0, 1.0], [1.0, 1.0, 1.0], [0.0, 1.0, 1.0]],
};
Results
Yay!
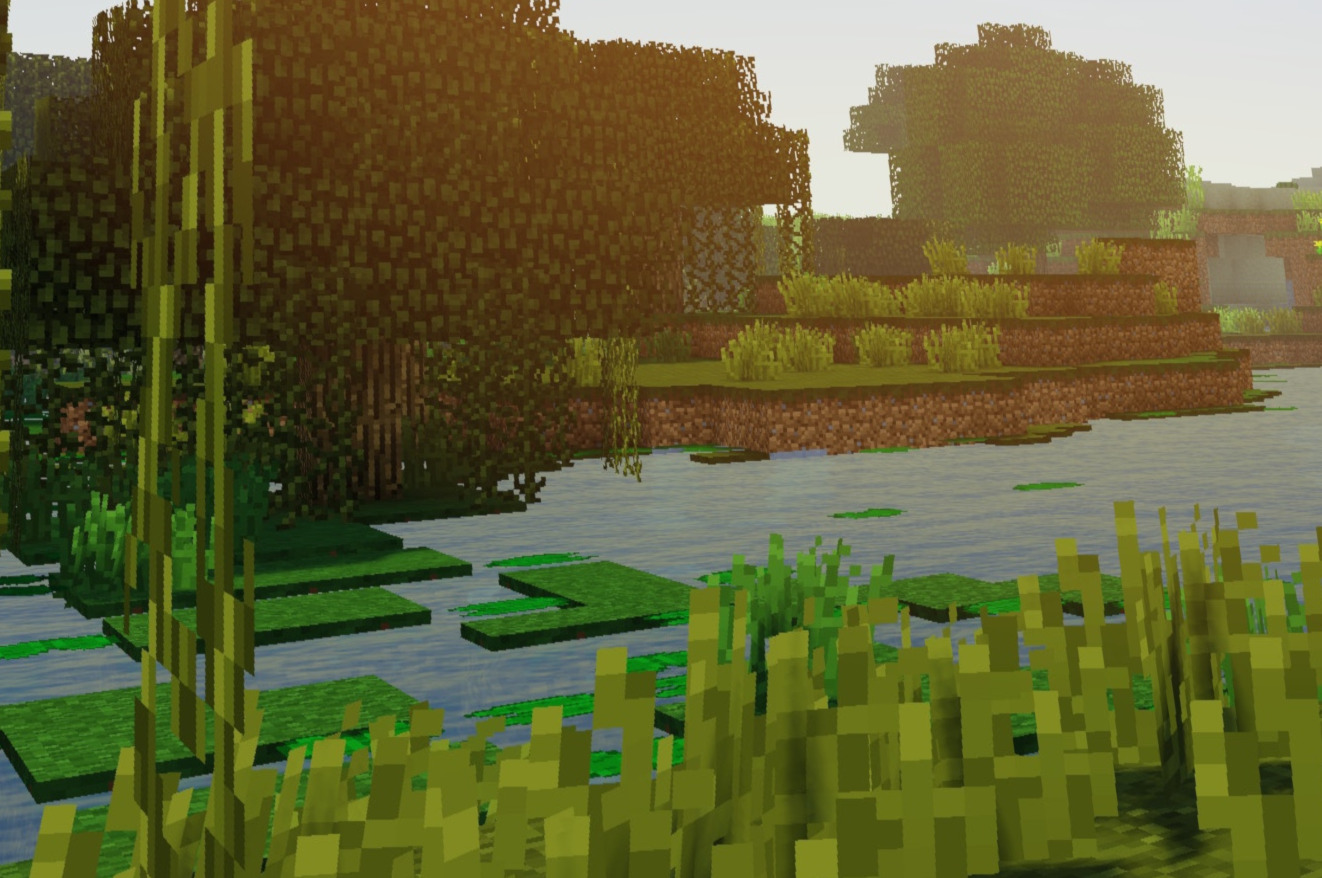
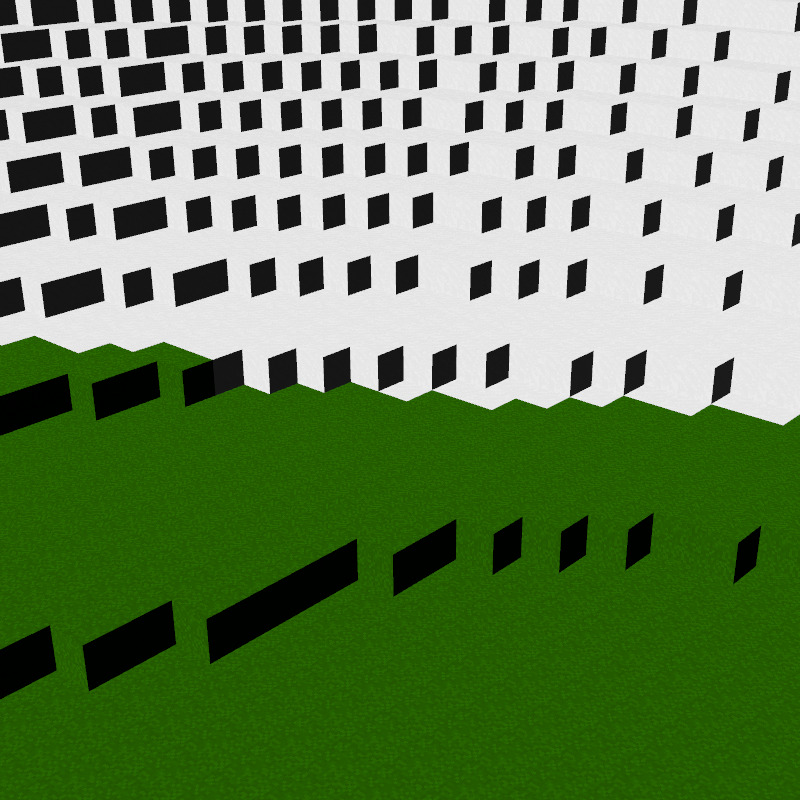
This hill was meshed with the mesher we just built.
I am more than happy with the result. The API is clean and simple, it looks exactly as expected, and the performance is acceptable.
Next Steps
While this implementation is fast and simple, there is a lot missing.
Greedy Meshing
Greedy meshing groups quads of identical voxels together, reducing the number of triangles and vertices in the final model.
However, greedy meshing comes with drawbacks – it can be significantly slower than simple meshing and is much more complicated to implement.
Additionally, in a real game with many different voxel materials, lighting, ambient occlusion, and more, you might not actually be reducing your final vertex count by much (if at all).
Also, you should keep in mind that your GPU is many times more powerful than your CPU. Giving up significant CPU work in exchange for minimal GPU relief is a very bad tradeoff.
At least for a blocky voxel type game, I am under the opinion that Greedy Meshing is not worth it. If your voxels are significantly smaller, you should consider giving up meshing entirely and using raytracing instead.
Ambient Occlusion
Ambient occlusion is a visual effect that adds much needed depth to your voxel game.
Implementing ambient occlusion slows down meshing and decreases the efficiency of greedy meshing, but the effect is definitely worth it.
Coordinate Systems
Implementing a meshing system that can work in any coordinate system may be a good way to kill a couple of hours.
Flowing Liquid
Non-voxel meshing is still important to voxel games. Special care must be taken to respect transparency and internal voxel face generation.
Having support for things like ladders, grass, doors, and half slabs is important for any would-be voxel game.
Conclusion
As you can see, there’s a lot more work to be done.
… but that will have to wait for another day.
To be continued in part 2.
Aww!